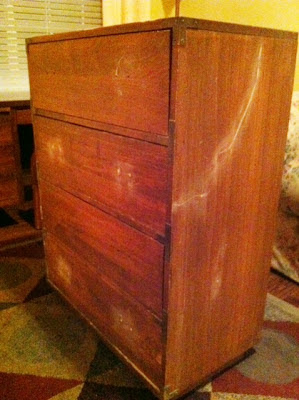
It was not very pretty. Ok. It was ugly, but I could see its potential. 2 of the drawer sliders were broken, it was missing one drawer pull, and another drawer pull was broken. It had a piece of wood screwed in its side and scratches galore. It had a laminate top and I knew it was not a real Campaign dresser. I like to call it my faux Campaign.
The drawer sliders were an easy fix. I just needed to re-staple and super glue the metal slides to the bottom of the drawers. I removed that hideous piece of wood that protruded from the side and all the drawer pulls and I got to work filling in the holes and the scratches with Elmer's Wood Filler.
 |
| Filled in the drawer pull holes so I could center 2 pulls. |
 |
| See the big scratch along this side? |
The hardest part was removing the hardware. I used a small screwdriver and a hammer to get all the hardware off. I tried cleaning the hardware with vinegar and salt to no avail. I knew that this dresser was not made of the highest quality wood, so I tested the pulls with a magnet and all the hardware attracted the magnet! So I knew it was not really brass. Gold spray paint was in order.
I mixed my own chalk paint (see recipe below) in a butterscotch color and started painting away. It took me 4 coats of paint to get this one just the way I wanted it. I sanded with 320 grit sandpaper in between coats. After the last coat was dry, I brushed on a thin layer of Minwax polycrylic and sanded it with 400 grit sandpaper when it was dry. I added one more thin layer on polycrylic. I lightly sanded again with the 400 grit, but this time I lightly spritzed each section with water as I sanded. I believe this is called wet sanding. It gave it the really smooth finish I was after.
I reattached the hardware, but was missing 2 drawer pulls because they were broken or missing. I fixed that by centering one drawer pull on 2 of the drawers. What you see below is the finished dresser. What a change, huh?!
Recipe for Homemade Chalk Paint
1 Cup Latex Paint
2 Tablespoons Unsanded Grout
Water
Mix grout with just enough water to make a runny paste. Add paint and mix. You may have to stir occasionally because the grout sometimes settles to the bottom. Sand each coat when dry with 320 grit sandpaper to get a smooth finish.


No comments:
Post a Comment